|
<< Click to Display Table of Contents >> Editing Profile |
  
|
|
<< Click to Display Table of Contents >> Editing Profile |
|
Available in v16 and higher
Available in Standard
Updated in v20.1
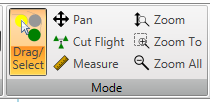
Using the Edit > Mode > Drag/Select button, components of the profile can be moved:
1.Select the object in the 2D view,
2.Dragging it to the desired location.
Multiple objects can be moved as a group at the same time by selecting blocks of objects"
•Using the mouse to define a rectangular area on the drawing.
•Selecting more than one object by left-clicking the mouse button while depressing the Ctrl Key.
Objects that can be moved include:
•Pulleys
•End points of belt segments
An alternative approach to moving objects is to first select the object(s) then input the move displacement using the Edit > Shift menu item.

Using the Edit > Mode > Cut Flight button, belt flight segments can be divided into two parts:
1.Select the Cut Flight button,
2.Draw a cut line with the mouse, with left button depressed, at the desired division point.
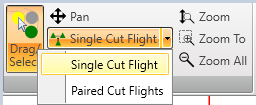
There are two modes to cut flights in the program. (1) Single Cut Flight mode and (2) Paired Cut Flights mode.
•When using single cut flight mode, the cut flight action will only cut the belt at one position (as designated by the user-drawn line used for cutting).
•When using paired cut flight mode, the cut flight action will cut the belt in two positions. The first position will be at the user-designated position for cutting, the second position will be on the matching position on return or carry side. in other words, if the user cuts a point on the carry side, the program will automatically create matching cut point on the return side. Or if the user cuts a point on the return side, the program will automatically create a matching cut point on the carry side. The two created points will automatically be paired together.
Using the Edit > Mode > Actions menu items, some pulley data can be modified directly on the 2D view:
1.Select the object in the 2D view,
2.Click the appropriate button in Actions menu.
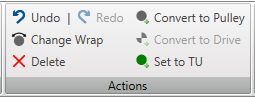
•Change wrap direction,
•Convert on point on a belt flight segment to a pulley,
•Convert a standard pulley to a drive pulley,
•Convert a standard pulley to the takeup pulley.
While utilizing the 2D profile view, the pulley diameter can easily be changed in the data table shown below the drawing.
Pulleys and belt segments can be deleted by first selecting the ogject(s), then using the Edit > Actions > Delete button.
See Also: 2D Graphic Input, Paired Flights, Finalize Profile